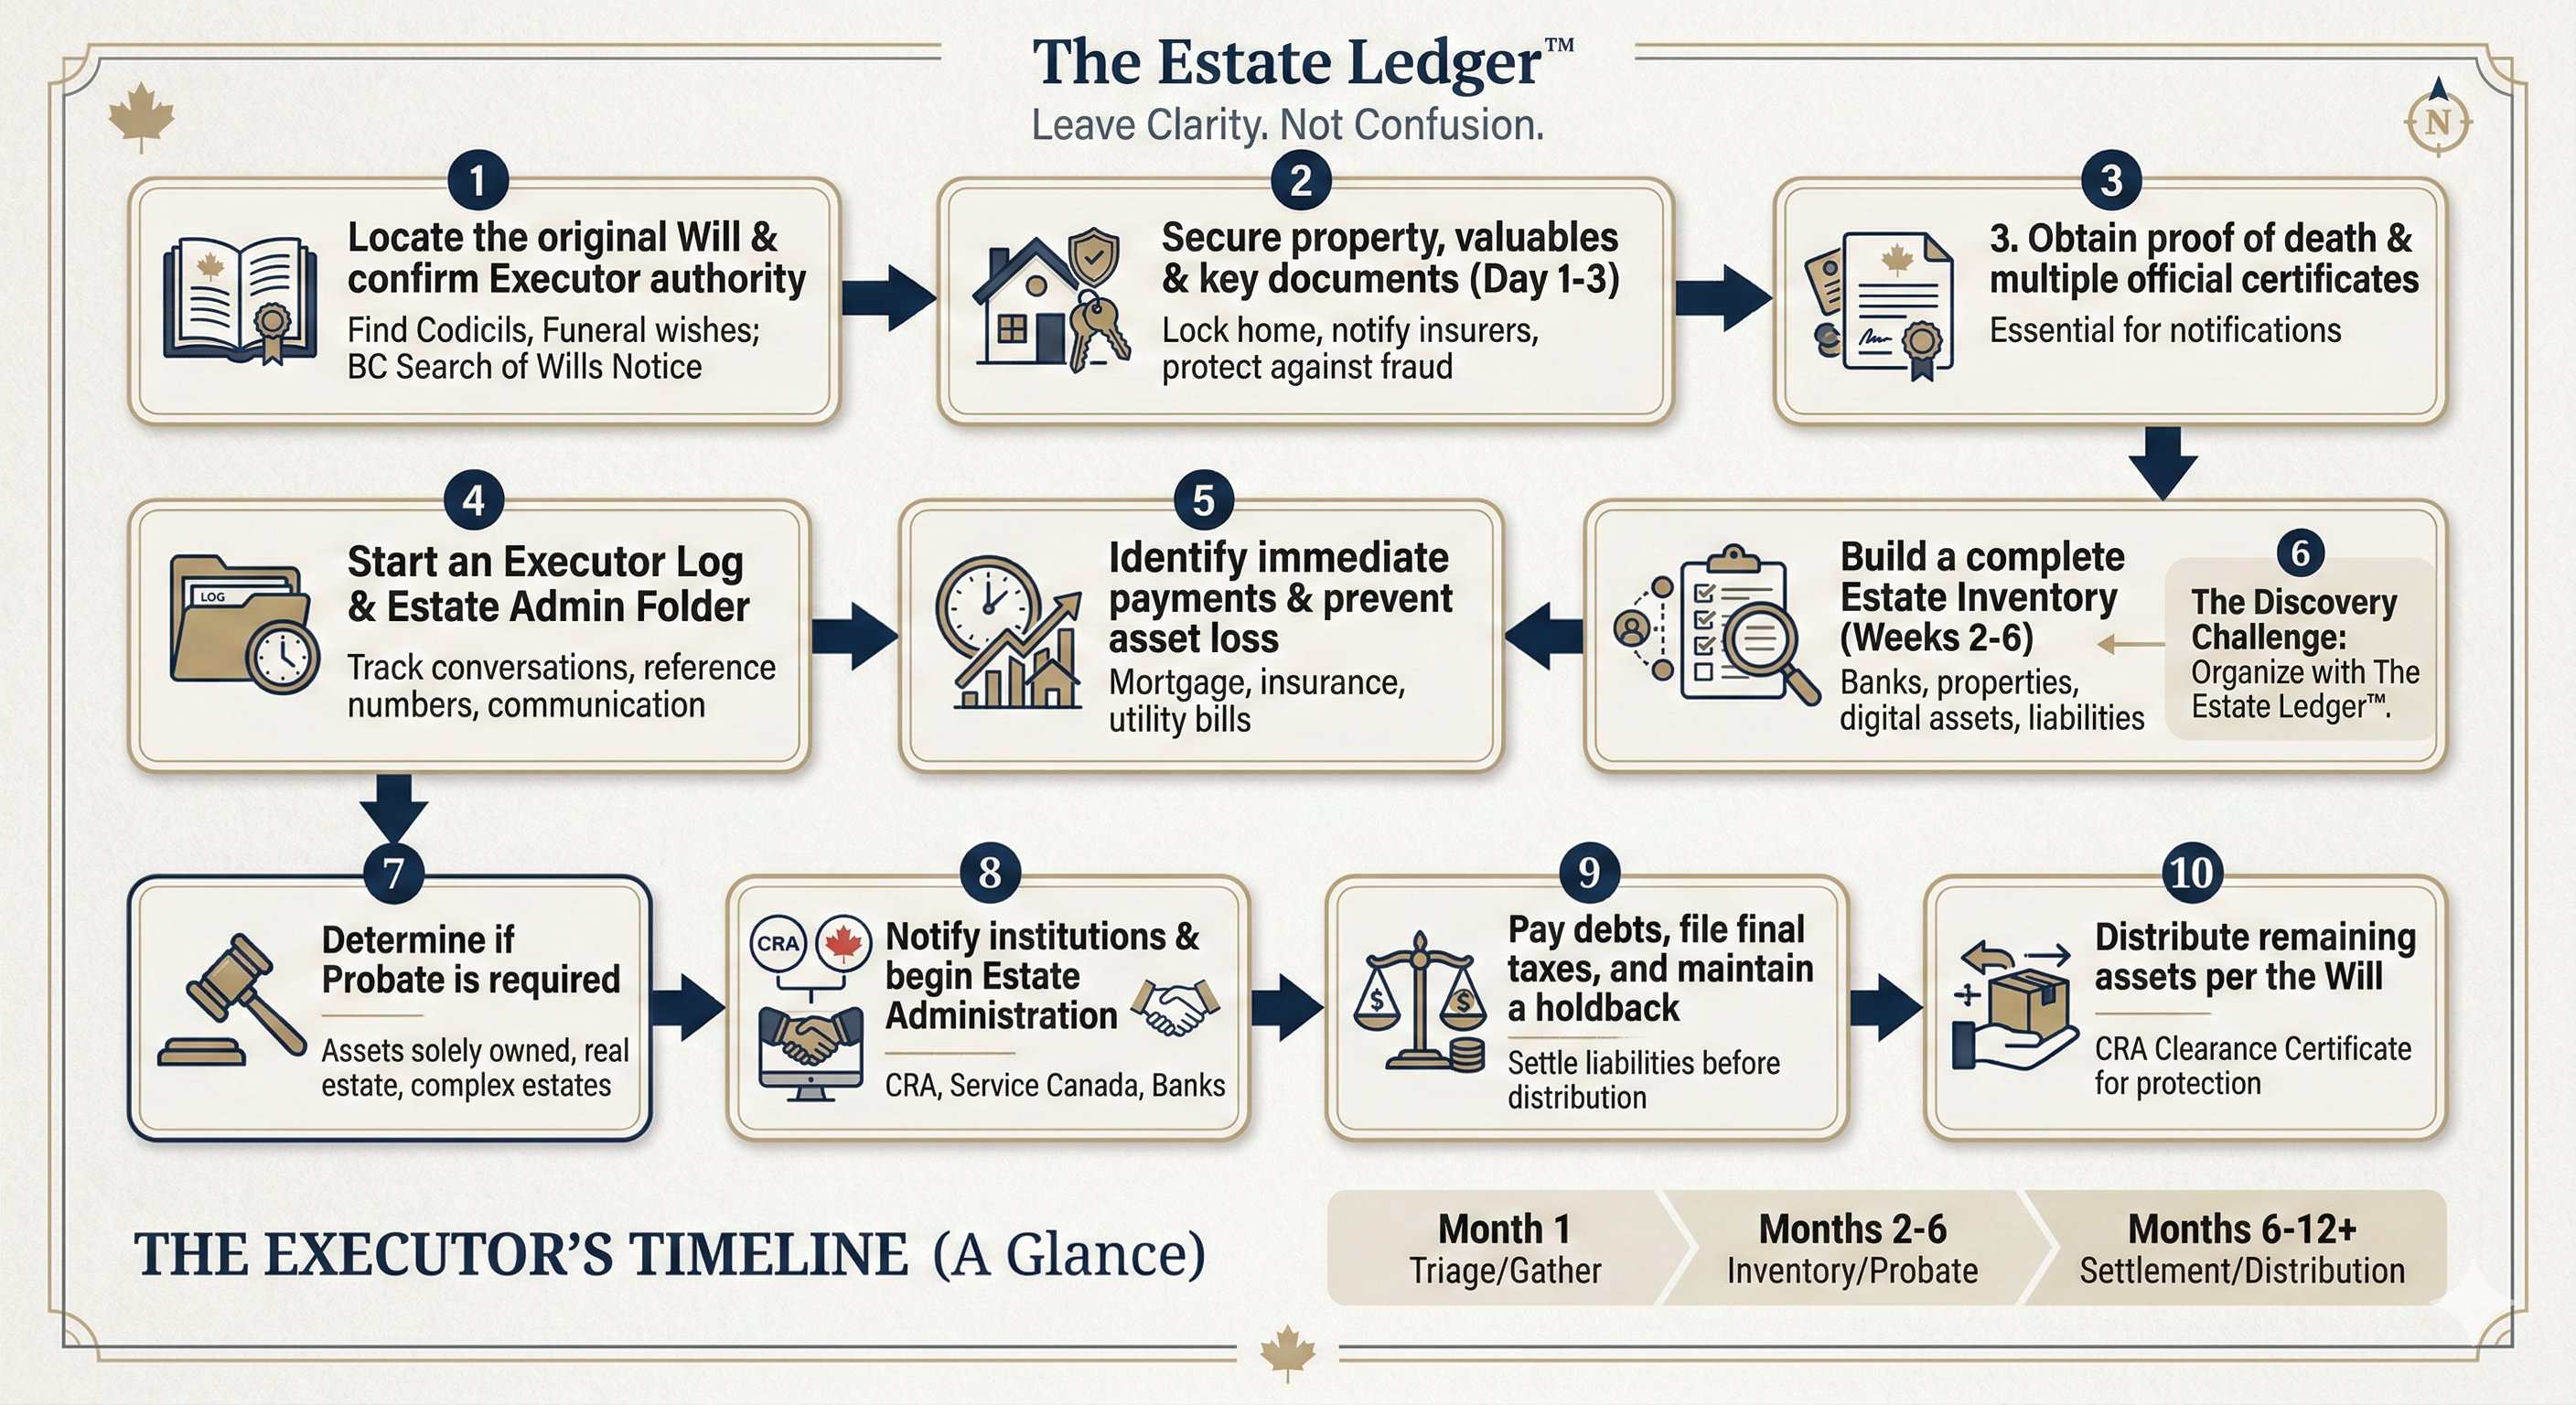
Locate the original Will and confirm you are the executor
Before you make major decisions, confirm authority. Find:
- The original Will (not a photocopy)
- Any codicils (updates to the Will)
- Funeral or burial wishes (if included)
Note If the death occurred in British Columbia, the executor typically must complete a Search of Wills Notice through the BC Wills Registry and include the search results with the probate application.
If you’re outside BC, requirements differ by province, but the principle is the same: confirm the Will’s location and validity early.
Secure property, valuables, and key documents (Day 1–3)
Your first duty is to prevent loss, damage, or fraud. Secure:
- The home (keys, locks if needed, valuables)
- Vehicles and ownership documents
- Mail (to reduce identity theft risk)
- Important paperwork (statements, insurance, property records)
Avoid “distributing items for safekeeping.” Even well-meaning family members can create future disputes if items are moved before an inventory is documented.
Obtain proof of death and order death certificates
You will need proof of death for banks, insurers, and government notifications. Order multiple official death certificates, because different organizations may require original copies.
Create an “estate admin folder” immediately (digital or physical) and store every certificate, receipt, and letter in one place.
Start an executor log (your best protection)
This is one of the highest-leverage things you can do. Track:
- Date and time
- Who you spoke with
- Organization name
- Reference numbers
- What was agreed or requested
This reduces repeat calls, protects you if questions arise later, and helps you communicate clearly with beneficiaries.
Identify what must be paid immediately (Week 1)
Some expenses need attention early to protect estate assets:
- Home insurance (do not let it lapse)
- Mortgage or rent
- Utilities (heat, water, security systems)
- Condo fees (if applicable)
Do not pay everything automatically without understanding the estate’s situation. Your goal is to prevent avoidable damage, not to settle the entire estate in the first week.
Build an estate inventory (Weeks 2–6)
This is where most executors get stuck. Create a complete inventory of what exists, including ownership details.
Asset categories to list:
- Bank accounts and credit unions
- Registered accounts (RRSP, RRIF, TFSA)
- Non-registered investments
- Real estate (home, rental, cottage)
- Vehicles
- Insurance policies
- Business interests
- Valuables and collections
- Digital assets with financial value (domains, crypto, online businesses)
Important: Ownership structure matters. Some assets may pass outside the estate (for example, certain jointly-held assets or accounts with named beneficiaries). Do not assume, verify.
The Discovery Challenge
Step 6 is where executors often spend 80% of their time. If the deceased didn’t leave a central record, you may be hunting through filing cabinets, mail, email, and online accounts for months.
This is why proactive planners use tools like The Estate Ledger™ to organize these details in advance, so their executor isn’t forced to reconstruct a life from scraps of paper.
Determine whether probate is required
Not every Canadian estate requires probate, but many do. Probate is commonly required when:
- Assets are held solely in the deceased’s name
- Financial institutions require court authority
- There is real estate to transfer
- The estate is larger or more complex
If probate is required, your Step 6 inventory and document trail will make the process significantly easier.
Notify institutions and begin estate administration
Once you have proof of death and confirmed your role, begin notifying
- Banks and investment firms
- Insurance providers
- Pension administrators
- Government programs (as needed)
- Employers (final pay, benefits, pensions)
You may need to open an estate bank account to receive funds and pay expenses. Keep estate money separate from personal funds at all times.
Pay debts, file taxes, and keep a smart holdback
Executors must ensure valid debts and tax obligations are handled before final distribution. A common best practice is to keep a reasonable holdback until assessments and tax filings are settled.
This reduces one of the biggest executor risks: distributing too early and then discovering taxes or claims later.
Distribute assets and obtain CRA Clearance
When it is time for final distribution:
- Follow the Will carefully
- Keep receipts and proof of transfers
- Maintain clear records of every expense and payment
CRA Clearance Certificate: Before you distribute the remaining estate, you may decide to apply for a CRA Clearance Certificate, which helps protect you from being held personally responsible for unpaid amounts that may still be owing.
(Depending on the estate, executors sometimes make interim distributions while keeping a proper holdback, but the clearance certificate is the strongest “final distribution” protection.)